Saturday, October 29, 2022

Woodshop, Tinting Panels, Small Easel Adapter


Woodshop, Tinting Panels, Small Easel Adapter

Woodshop, Tinting Panels, Small Easel Adapter

Woodshop, Tinting Panels, Small Easel Adapter

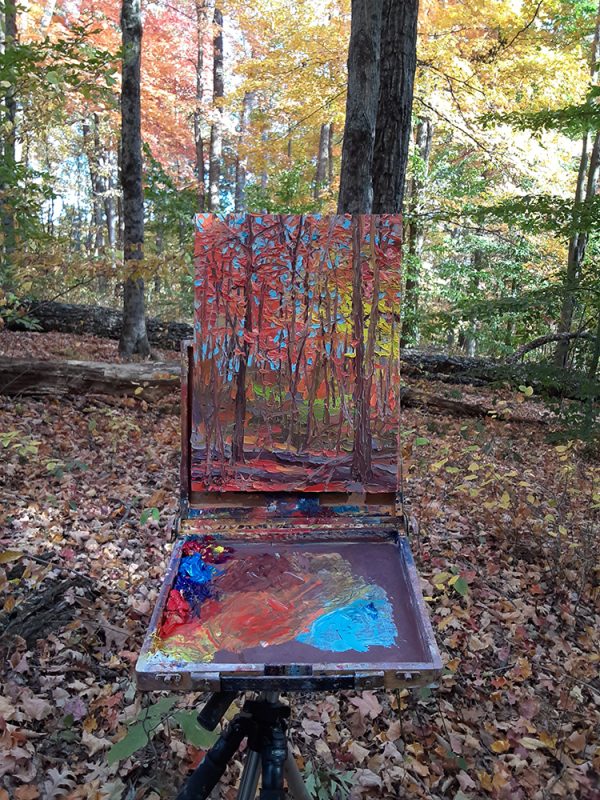
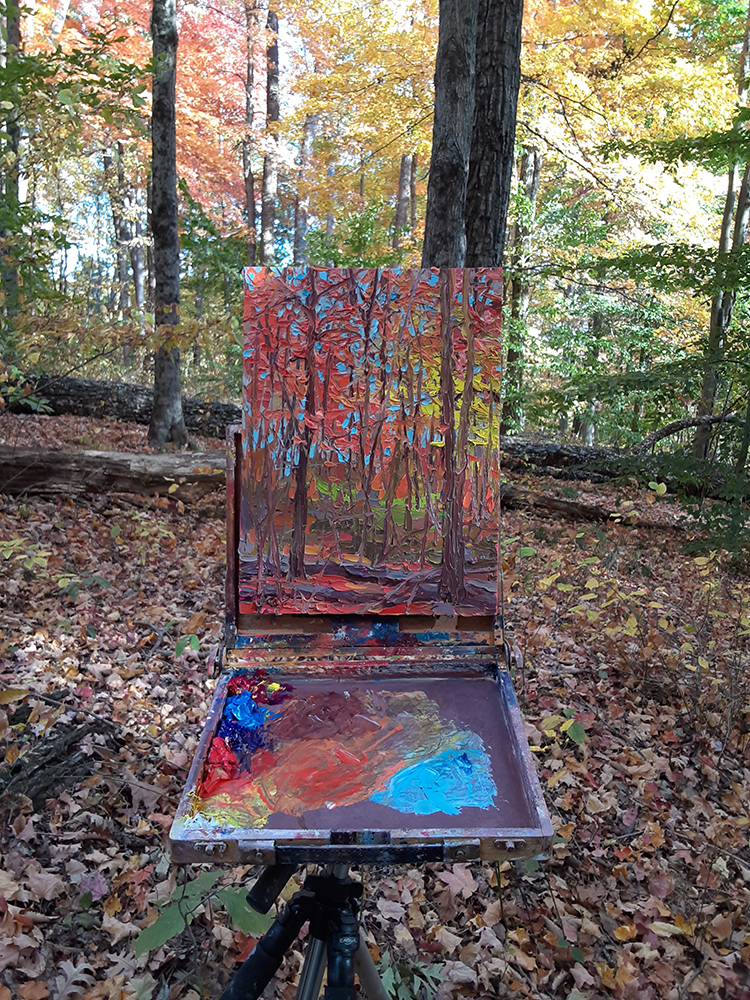
Super hectic time of the year.  Fall arrived early this year so I have been busy with the fall, plein air, oil painting as well as making new cradled panels and a small easel adapter.   The new, small, cradled panels are to create new oil paintings suitable for Christmas gift giving.  I also have a new commission painting project that needs to be done by Christmas so I have been working on that as well.  Not to mention cutting back large, flowering shrubs that were/are encroaching on the garden and my deer fence.  Whew!  Not enough hours in the day.  Who else feels that way?  So, I am a bit behind in the blogging.

Recent projects

Here are some quick snapshots of what I have been working on in the woodshop, prepping panels, and making some adaptions to my small easel that fits on my main easel.  Updates on new paintings will come soon!

Sanding

Woodshop, Tinting Panels, Small Easel Adapter
Sanding 8′ long 1×2 used to make the cradles.

The grain trough makes a good support for the 8′ long piece during the sanding process.

Woodshop, Tinting Panels, Small Easel Adapter
Sanding.

Gluing

Woodshop, Tinting Panels, Small Easel Adapter
Gluing the pieces onto the panel.

A couple stacks of panels with the cradle already glued on.

Cutting with the miter saw

Woodshop, Tinting Panels, Small Easel Adapter
Cutting cradle pieces with the miter saw.

I think I need a new saw blade.  One that is thinner and sharper.  This blade causes a lot of splintering on the cut wood that needs to be sanded.  I bought this miter saw used at the Brown County Humane Society Barn Sale in August.  While it works great, a new blade would be a great improvement.

Woodshop, Tinting Panels, Small Easel Adapter
Miter saw.

The woven wire fencing on the grain room is a great support for the long end of the 8′ wood.  The tape measure hanging down from the woven wire is used to measure a horse’s girth and height.

Tape on the miter saw is used to mark the length I want to cut the pieces for 6″ x 8″ and 5″ x 7″ panels.  But I think I need to replace it was masking tape with a sharper edge.

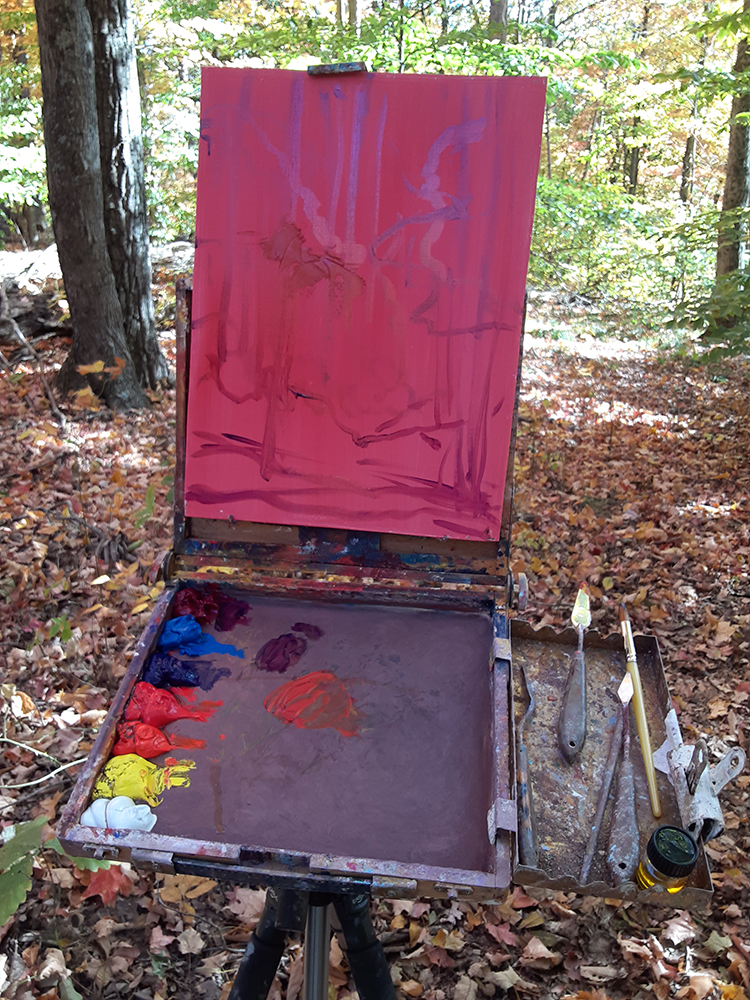
Gessoing and Tinting

Woodshop, Tinting Panels, Small Easel Adapter
Tinting panels.

When prepping new panels, I seal the front with GAC100 and then apply two coats of gesso on the front, back, and sides to completely seal the panel.  Then I tint it with a Cadmium Red Medium acrylic paint.

Adapting the Small Panel Easel Holder

A couple years, ago I made a small panel easel holder that could be used on my regular floor easel so I could  paint small paintings while standing up.  I much prefer to paint while standing.  Energy flows much better and I can stand back to see how a painting is coming along.  Sitting really crimps me and the flow of the painting.

The only thing is, the easel was made for using with flat 1/8″ panels.  And it has worked beautifully!

small panel easel
Small panel easel adapter.

But it didn’t work so well with the cradled panels.  The easel didn’t provide enough support for the wider box.  I painted a couple smalls on it and, except for one fall, it did okay.  But there is that unease that the painting could fall out anytime and ruin the painting.

Woodshop, Tinting Panels, Small Easel Adapter
Small panel easel with the cradled panel.

You can see how precarious the painting rests on the narrow support.

Small Easel Adapter

I wanted to keep the narrow strips for times when I am working on uncradled panels so I set about to make a new support.

First, I cut four 20″ wide strips of hardboard and drilled holes through all four.  Then I painted them white because I was using an old panel that was pink so I wanted a neutral color.  Two pieces of the 1×2 cradle wood were cut 16″ long and painted white, too.

Woodshop, Tinting Panels, Small Easel Adapter
Gluing the support pieces.

Then I glued the 1×2 support pieces to the very edge of the hardboard.  I used the same wood that I used for the cradles so that the face of the painting is flush with the supports and there is no “stop” to interfere with the motion when applying paint.

Woodshop, Tinting Panels, Small Easel Adapter
Small Easel Adapter

Then all layers, including a small spacer in the middle of the sandwich, were screwed together.

Turned out perfectly!

Woodshop, Tinting Panels, Small Easel Adapter
Small easel adapter on the floor easel.

Here is the small panel adapter on the floor easel.  I can go back to painting the small panels, standing up, with all confidence it will not fall on it’s face on the floor.

New paintings coming soon!

That’s it for today!  Stay tuned for new paintings, both plein airs and smalls.  The new paintings will be released for purchase in time for Christmas!

I love you!

Happy trails,

Charlene


Thursday, October 20, 2022

Plein air painting October 15, 2022


Plein air painting October 15, 2022

Plein air oil painting in Yellowwood October 15, 2022

Autumn Comes Early!

The fall colors are changing super early here in Brown County this year!  Usually, by mid-October the trees are still mostly green.  But not this year!  Already lots of golds, oranges, magentas, and vibrant reds!  So I decided to head out to the forest to paint.

Plein air painting October 15, 2022
Paint laid out, ready to go plein air painting October 15, 2022

I preloaded my pochade with paint rather than try to carry large heavy paint tubes into the forest on my back.  Back when Tara still made paper palettes, I would use a parchment paper palette in the bed of the pochade.  For awhile, after they discontinued making the parchment paper palette pads, I made my own from paper I bought in rolls from the supermarket.  But it was less than satisfactory so now I opt to just use the bottom of the pochade as my palette.  After I finish a painting, I scrap off the excess paint and rub the rest into the bed of the pochade.  The paint then dries into a neutral grey.

Plein air oil painting in Yellowwood October 15, 2022
Backpack ready to go out plein air oil painting in Yellowwood October 15, 2022

My backpack is loaded with my pochade, tripod, support, and other gear.  I hiked out about 1 1/2 miles to the end of the ridge and set up to paint.

Autumn Comes Early, air oil painting in Yellowwood October 15, 2022
Plein air oil painting in Yellowwood October 15, 2022

Set up, ready to paint!  There is a lot more autumn color than this photo shows.  I took my cell phone and a second tripod to videotape this painting but found the adapter for the tripod was the wrong one.  I’ve got 4-5 adapters back in the studio but the cell phone tripod takes a smaller size.  Drats!

Plein air oil painting in Yellowwood October 15, 2022

The initial sketch.

Autumn Comes Early, air oil painting in Yellowwood October 15, 2022
Plein air oil painting in Yellowwood October 15, 2022

Oranges, reds, and then greens.  I often start with the darks and move to the lights but in this case, I wanted to block in the brightest fall colors first.  Bright colors can easily be muted but are impossible to bring back the vibrant brightness once other colors are added.

Plein air oil painting in Yellowwood October 15, 2022

Tommy is checking out the backpack.  Luckily, he is starting to outgrow the puppy habit of grabbing and running with anything not nailed down.

Plein air oil painting in Yellowwood October 15, 2022

Continuing to block in the painting.  Starting to add the trees.

Plein air oil painting in Yellowwood October 15, 2022

Now I start to add more trees and block in the sky.

And this is where I goofed.  My palette consists of two blues, two reds, a cadmium red light which is really orange, a yellow, and a white.  Well, I should have put out a double dose of yellow because I ran out!  Since it is one of the three primary colors, there is nothing to fall back on.  I wanted to add some more green to the foreground and more yellow over all but had to leave it here.  The painting still turned out pretty good.

Autumn Comes Early, air oil painting in Yellowwood October 15, 2022
“Ridge Trail in Yellowwood Forest, October 15, 2022″, plein air oil painting, 16″ x 12”, ©Charlene Marsh.

SNOW!

And then, just three days later, we got 2″ of thick snow!  One of the earliest snowfalls on record!  The earliest was October 15, 1989 and I remember painting the snow with orange trees underneath looking out the window of my small studio building.  That was before I started to paint “en plein air”.  I think we got 8″-9″ that time.

Snow, October 18, 2022
My backyard with a layer of snow, October 18, 2022.

Autumn colors covered in snow.

Snow, October 18, 2022
Yellowwood State Forest, Snow, October 18, 2022.  The fence marks my property line with the state forest on the other side.

So, that’s it for today!  Super crazy busy with projects but I wanted to keep you posted about new paintings.  Thanks for tuning in.

I love you!

Happy trails,

Charlene

Sunday, October 9, 2022

Let's Tango!


Let’s Tango!

Wedding Painting

Let’s Tango!

I’ve got to admit.  I love weddings and wedding paintings.  Everything is so beautiful.  Everyone is so happy.  The bride and groom, the guests, the gown, the cake, the flowers, the food, the venue, and the music are all gorgeous and joyful.  Weddings are fun.  People connecting with old and new friends and family.

So, I love painting weddings.  And want to share with you a little nugget of joy today.  This is a 6″ x 6″ painting of a bridal couple dancing their “First Dance” together.

Tango Wedding Painting
First Dance Tango Wedding Painting

Details:

Tango Wedding Painting
First Dance Tango Painting, detail.


Tango Wedding Painting
First Dance Painting, detail.

Let me know if you would like a wedding painting!  I can attend your event or work from photos.  A wedding painting makes a fabulous gift!

Dumping Bench Seats

Setting up a woodshop in the barn has taken some of my time recently.  Moving equipment and tables, running an electric line and hanging lights.  But first I had to move out of the barn two bench seats from my old Ford Windstar minivan.  The van bit the dust two years ago but the bench seats were stored in the barn because I never used them in the van.  The van was for hauling stuff.

The Windstar started out being my vehicle for doing shows. Winnie the Windstar went with me to shows in Coconut Grove, Winter Park, White Plains, NY, Gatlinburg, Saint Louis, and too many other places to remember.  She was a good car I had for nearly twenty years.  When I outgrew the minivan I upgraded to a cargo van and kept the minivan for local errands.  Hauling trash, recycles, hay, straw, and sometimes art and art show gear.

Spicers

So, anyway, when she bit the dust, the bench seats were in the barn and in the way.  I had to call around to find someone to take them.  Hopes of selling them or dumping for free faded quickly.  I ended up wrestling them into the back of my truck, with the help of a neighbor, and deposited them at Spicer’s Refuse just outside of Nashville. Had to pay $15 per seat to dump them.

Wood Shop

Woodshop at the Barn
Miter Saw

Setting Up

But now I have room in the foyer of the barn to set up my miter saw with a sold, wood floor underneath.  Took some other equipment like an electric hand sander and circular saw to the barn as well and ran an electric line back there.  Still need to replace plastic on the windows and tweak things once see what I need.

Woodshop at the Barn
Hand sander with cut pieces for cradle boards.  A circular saw is on a workbench in the background.

The shop lights may need to be adjusted.  I need more light in the sanding area where I also measure the lumber before cutting it.

Woodshop at the Barn
Another view of the hand sander and cut pieces for cradle boards.

I dug out an old analog radio to use at the barn and it worked great when tested up at the house.  But once I got to the barn, it was so low as to be barely audible.  After some more experimenting, I found if the volume was turned all the way up, the sound went down.  If I dialed it back a tad, the volume was great.  Go figure.

Woodshop at the Barn
Miter saw in the closed position.

More Clean Up and Organizing

I still want to clean out the grain room and lean-to.  But I need to make some cradle boards first!  Getting ready for a Christmas event where I will be releasing new oil paintings, suitable for gift giving, every day for thirty days.  Stay tuned for more information!

Whenever I sell a painting, I want my collectors to be able to take it home and hang it up right away.  If they have to go out and buy a frame, the painting could sit for weeks, months, or forever and never get hung.  Even if they want to switch out the frame, at least they can hang it and enjoy it until they get a new frame.

Small Cradled Panels in the Making

Cradled panels
Cradled panels

When it came time to glue the pieces to my panels, I took them to the studio where the temperatures won’t get too cold for drying and curing the glue.  Next, I will add a nail to each end and use some wood filler on the corners.

Strip Frames

One comment by a visitor to my booth at a recent show was that the new strip frames echoed the trees in the paintings and looked really good.  They are so right!  The strip frame just looks like another tree in the landscape.  I love it!

Four Season Grouping
Four season grouping of oil paintings with strip frames that echo the trees in the painting.

For the smaller paintings, I will use a smaller scale strip for the frames.

That’s it for now!

Enjoy the changing seasons.

I love and appreciate you very much!

Happy trails,

Charlene

P.S.  You are always welcome to visit my studio/gallery here in Brown County, Indiana.  Just call (812-988-4497) or email me (Char@CharleneMarsh.com) to make sure I am available at the time you’d like to visit.

Tango