Thursday, March 31, 2016

032416 24x36 Summer Flowers Next to the Creek

The support for this painting is a 24" x 36" hardboard panel that I have already prepped and tinted with napthol crimson acrylic paint.  The rule is "fat over lean" meaning oil can go over acrylic but not vice versa.  Same rule applies to food, too!  Ha!  Fruit (lean) first followed by fats!  Fruit digests so quickly, that if you eat it after the fat, it will start to ferment in your digestive system and cause problems.
Anyway, back to the painting.  I draw out the initial sketch using a brush dipped in cold pressed linseed oil and magenta and cerulean blue. 
I mix a dark green using Ultramarine Blue, Cadmium Yellow Light, and a bit of Magenta Red or Cadmium Red Medium and start blocking in the background trees.  A dark earth color is mixed with the Ultra Blue and Cadmium Red Medium and used to flesh out the creek bed.
I mix blue greens to recede into the background and mix greens with more yellow and warmer colors to move forward.
I mix a violet with the Magenta and Cerulean or Magenta and Ultra Blue and pick up a little mixed green to dull it down a bit.
I mix a turquoise for the creek as well as some of the Cadmium Red Medium mixed with Cerulean Blue.
I mix a very light sky blue with Cerulean and Titanium White and pop it in along the horizon line where the sky is lightest. 


 The sky is filled in with a mix of Cerulean Blue and Titanium White.

Once I have the "muscles" of the painting in place, I start adding the flowers. 
I use the pure Cadmium Red Medium and Light for the poppies.  A mix of the magenta with a touch of yellow and lot of white are used for the initial hollyhocks.  As the painting progresses, I mix up various hues and values for the hollyhocks.  Some with magenta and white and other mixes have some cerulean or ultra blue added. 

I add the little waterfall to the creek and the ripples on the water.  All the while continuing to add all kinds of flowers to the painting.  


Wildflowers, poppies, lilies, sunflowers, and Queen Anne's Lace are added and worked over the surface. 


And the finished painting, "Summer Flowers Next to the Creek", oil on panel, 24" x 36", #032416 24x36, by Charlene Marsh.

Thanks for following along!

Happy Trails!

Charlene 

P.S. Be sure to sign up for The Art Brush newsletter to see what I share with subscribers!

Thursday, March 24, 2016

032016 24x36 Snow, Commission Oil Painting

This painting was commissioned by a couple who wanted something that would reflect the native forest to hang over their fireplace.  They found my website and then visited my studio/gallery.  They selected their favorite paintings and we discussed what they liked best about each one.  I took notes so I could incorporate the features they particularly loved into a special painting for their living space.  

We also discussed what kind of frame would work best for them, their space, and the painting.  I sent them pictures of samples of frames to select from.  They took exact measurements of their space so I could create a framed painting that would fit perfectly.  


Here's my work space (above).  I use two easels, side by side, to support the painting.  I have track lights overhead to use at night or if it is too overcast.  Otherwise, I like natural light and have plenty in the studio from large windows and skylights.  I have a couple side lights to shine directly on my taboret and palette and one to shine on my reference material, as needed.  In this case, for reference, I have two paintings (one is on the work bench on the left)and a photo of a painting that was adjusted in Photoshop to reflect the dimensions of the 24" x 36" panel.


The couple decided that the painting needed to be 24" x 36" with a 3" wide, mahogany frame.  Incorporating everything we had discussed, I sketched out the painting on the 24" x 36", tinted panel with a brush dipped in a mix of oil, cerulean and magenta crimson.


I mixed a dark black using ultramarine blue and cadmium red medium with a touch of yellow.  I never use a premixed black from the tube.  The black is blocked in where ever there are the darkest darks in the scene.  In this case, the creek bed.  The bluff on the left has more cadmium red and yellow mixed in to give it the earth color of the soil.


The gulleys between the hills are painted in using various mixes of cerulean blue, magenta crimson, ultramarine blue, and cadmium red medium. I mix small portions at a time and dab it in throughout the painting.  I like to "carve" out the hills with the paint before adding the trees.  Using an anatomical metaphor, the initial sketch is the "skeleton", the hills are the "muscles", and the trees and leaves and branches and other details flesh out the "skin".


The background trees, mixed from cadmium red medium, ultramarine blue and lightened with a tiny bit of white, carve out the shape of the hills where they meet the skyline.  Lighter snow shadows are mixed with the brighter cerulean to reflect the sparkling cerulean sky. 


Here, I start to add the highlights to the snow on the hills.   With lots of white, I mix a touch of cadmium red light, cadmium red medium,and a pinch of cadmium yellow light to make the warm highlights to contrast and pop against the cooler, blue shadows of the snow.  I also add the major trees to the landscape.


For the sky, I mix a tad of cerulean with generous amounts of white putting the lightest value along the horizon line next to the trees.
I continue adding trees and more of the creek.  I use leftover colors from the palette to indicate the creek bed with the earth tones and shale.  I mix up the blue-green shale with the cerulean blue, a little bit of cadmium yellow light, and a touch of cadmium red medium, the complementary color, to grey it down.

The delicate beech leaves, bleached out over the winter, are mixed from cadmium red medium, cadmium red light, cadmium yellow, and varying degrees of white, with a touch of ultra blue, again, the complement to grey it down a bit.  The beech leaves are worked over the landscape and particularly in the gulleys where they tend to concentrate.  More trees and branches are added.  The rushing whitewater is added to the falls of the creek and the ripples of the flowing water.


The painting continues to be adjusted, working over the entire surface as well as background and foreground and back again.  I dance close in and back out from the easel, fine tuning the painting until I am satisfied with how it looks. Often I stop when I don't see anything left that "bugs" me!   

As soon as I was done with the painting and, while it was still wet, I shot a photo of it, adjusted it in Photoshop to accurately reflect the colors, and emailed it to my clients.  Knowing how computer monitors can vary in depicting color accurately, I invited them to buzz out to the studio to see the painting in person.  Luckily, they live in the neighboring county and were able to come out the next morning.  

As soon as they stepped in the door, they were ooohhhiing and aaaahhing and I knew they were pleased with the painting.  They told me that when they saw the photo on the computer, it appeared to have more blue (no warm colors) and more purple blue than they preferred (they wanted warmer blues like cerulean)So they were ecstatic to see the painting in person and see that it totally met their expectations!  I was thrilled, too! 

Here is the finished painting:


"Hill Country in the Snowy Forest", 24" x 36", oil on panel, c. 2016, by Charlene Marsh, #032016 S 24x36.

And here is the painting installed in my clients' home!  Looks absolutely fabulous!  The grand windows to the left feature the same hilly, wooded topography depicted in the painting.  The colors of the painting go perfectly with the decor and woodwork of the home.  This painting is the focal point of the open concept living space and truly makes the heart sing in this home!

Thanks Doug and Saundra for trusting me to create a gorgeous painting just for your home!

Thanks for following along!  Be sure to sign up for The Art Brush newsletter I send out anywhere from once a week to once a month.  Subscribers get special pricing and other goodies.

Happy Trails!

Charlene

Sunday, March 20, 2016

Red Tint and Panels vs. Stretched Canvas


I recently got this email from a subscriber:

Hi, Charlene,
     I have been receiving your emails and following your work since December, I believe.  I am just fascinated with your heavy impasto style.  Your work is so intricate that I doubt you will ever have to fear your works will be forged.  Ha!
     While I understand that a lot of painters choose to underpaint their surface in a mid-tone, can you explain why you choose to use red as an underpainting in your landscapes? 
     Also, please tell which you like to work with better as a surface: the solid wood or stretched canvas. 
     Thanks for sharing your paintings and your expertise.  I really enjoy it.
 Carolyn (Private Hidden)

Hi, Carolyn~

Thanks for your email. Glad you enjoy following my paintings!  I figure if you are asking these questions, other people might be as well so I will post this to my blog.  

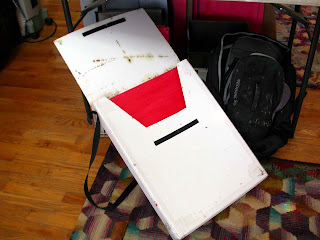
As for why I choose to use the red tint for my under painting, I tried tinting my supports with various different colors through the years and settled on the napthol crimson.  Although, it is always fun to experiment!

Despite the brilliant, intense, red color, it is a middle value.  I want a color that is a middle value so that when I put down a dark, it is relative to the middle value of the tinted panel.  And when I put down a light mark, it is actually light against the tinted base.  If I start with a white base, any color put down on white will automatically be darker than that.  So the crimson tint works as that middle value while blocking in the painting.
  
I have found the red color just works well with the four season, forest paintings I like to do.  As the complementary color to green, the little flecks of red that show through, sparkle and vibrate with the green paint of the foliage, adding a certain visual electricity to the painting.  

In winter, the red sparkles against the cool blues adding a bit of warmth.  People often "see" cardinals in the trees as a result.  In the fall, the reds blend in with the fall foliage and keep bits of white support from showing through and being visually distracting.  And the fresh spring greens look lovely against the red as well.  
As for wood panels versus stretched canvas, I prefer the wood panel supports over stretched canvas, especially painting with the palette knives.  The canvas has more "give" than the wood panels.  The panels provide a good solid support for the knife work and heavy impasto paint.  

I also have experimented with canvas attached to wood but found the resulting surface has too much "drag" for my liking.  I love the fast, slick surface of the wood panels with the dynamics of the palette knives! 
http://www.charlenemarsh.blogspot.com/2016/01/wet-panel-carrier-boxes.html 
The panels also work well for the plein air painting and fit easily in the various wet panel carrying boxes.  You can read my BLOG HERE about the wet panel carriers. 

Having said that, I decided to try the stretched canvas again - it's been a few years since I've used it!  I wanted to try a diptych (see my blog here PART 1 and PART 2) on the thick stretcher bars with the canvas wrapped edges so that the finished painting would not need to be framed.  And the two canvases could hang side by side and work, visually.  Surprisingly, I enjoyed working with the stretched canvas more than I thought I would and will have to do more.

The reason I wanted to do a painting that did not need to be framed is because my frame suppliers have really let me down the past year(out of stock, changed the finish, limited frame sizes, etc.) and, despite a concentrated search for replacements, I have still not settled on a good solution.
  
People all have different ideas about what kind of frame they want so I try to select a stock frame(s) that works for both contemporary and traditional tastes, preferably both a light and a dark option, and works well with most of my paintings.  Keep it simple.  Quite a tall order!  Here is my BLOG WITH A LIST OF FRAME SUPPLIERS that might be helpful for both the collector and the artist. 

To hang and present the paintings on the panels, they MUST be framed. I cannot attach the hanging hardware to the panel - the hardware must attach to the frame.  I could glue a wood strip on the back of the panel and attach the hardware to that.  But, in the end, I just think that the panels - and paintings - look much better with a frame.  

Saying that, I was very pleased with the end result of the stretched, canvas wrapped supports and like them without a frame.  I just need to paint them far enough in advance that they will be bone dry by the time they need to go to a show and then wrapped carefully to protect the thick paint. 

In the end, I think an artist needs to experiment with various supplies and equipment and find what he or she prefers, what best transmits his or her unique "voice".

So, I  hope that answers your questions, Carolyn!  Thanks for asking!


Happy Trails!

Charlene 


Thursday, March 17, 2016

Deer Fencing and Happy St. Patrick's Day!

Happy St. Patrick's Day!  One year ago today I spotted a cougar in the woods behind my house.  Still so thrilling to remember!  You can read that blog post HERE.
cougarThe wildlife in Brown County is both a thrill and a frustration.  While I love the graceful, gentle, beauty of the deer, I grow aggravated when my gardens are devoured!  So, I have been very busy driving posts, hanging gates, and hanging nearly 400' of deer fencing.  The early, warm spring days meant things are coming up fast and I needed to replace the fencing I had ripped out a couple years ago when it got mushed down too much to be any good anymore.  

Last year I tried the "fish line" fencing which did not work at all!  I have also used the Liquid Fence that is effective as long as it doesn't rain.  If it rains, forget it.  The deer are chomping down my garden goodies before the sun comes out.  I tried the coyote urine which worked for about two months (slightly less time than advertised) but I had two big problems with using that.  1.  Collecting coyote urine has got to mean animals are suffering terribly.  2. Too expensive to effectively protect all my beds and gardens.  The cruelty to animals was ultimately the reason I would never use it again and am very sorry I tried it at all(guess I was desperate but that is no excuse).

I have heard of other methods like a strobe light but not sure I want a strobe flashing all night long when I value the dark of night, the light of the moon, and the subtle wink of the stars.  Not to mention an occasional falling star!  Besides, I have seen deer in my yard and gardens in the middle of the day so the strobe won't work.

So, I was all ready to build a 4' double fence, one inside another, spaced 3'-4' apart, that is supposed to work.  I figured I could use the inner fence for trellising.  But when I got to Menards, I found a deer fencing kit with 100' of pretty strong, 7' polypropylene deer fence.  NOT deer netting which can tear and would simply not be strong enough.  The kit came with some pretty flimsy posts but I paired them up with the heavy duty, steel posts and they worked just fine.  The flimsy posts provided the height while the heavy steel posts provided the strength and stability.  I zipped tied the posts together.  I also bought the 8" long zip ties - the ones in the kits were too short to use.  

I got some 10' conduit thinking I could drive those to get even more height but found out why 8' posts are the tallest they make.  HA!  Try lifting the post hole driver up and off the post after pounding it in, 8'-10' up in the air, tottering up on a ladder!  

So...I fenced in three gardens with four of the deer fencing kits augmenting with both 8' and 5 1/2' steel posts.  One nifty thing included in the kit was some holographic, sparkling, reflective tape.  So I topped the posts with the tape so it blows and sparkles in the wind.  Since putting up the fence with the sparkly tape, I am not even seeing deer prints around the gardens or in the yard at all.  So I set a couple posts in a couple different, unfenced lily beds to see if that will help keep the deer from devouring my lilies.   So far so good!

I already have several rows of greens coming up and cannot wait for the fresh garden goodies!  A variety of lettuces, kale, cauliflower, and spinach are already well on their way to the harvest!  I am also looking forward to having gardens of flowers to paint again!  Keeping my fingers crossed that this new fence does the trick.

UPDATE:  May 16, 2016.  I am happy to report that the deer fencing is working just great!  I think the reflective, sparkling tape is helping tremendously in the unfenced flower beds as well.  I am not seeing any evidence of deer in the yard or around the gardens at all.  However, just this week, I have noticed a wascally wabbit in the garden and found where he had chewed a hole through the bottom of the fence so I may need to reinforce with wiring along the bottom.  

Well, back to painting! 

Happy Trails!

Charlene

Friday, March 11, 2016

030416 30x60 PART 2 Poppies, Hollyhocks, and Lilies by the Creek

Okay, this blog will start where I left off, starting the second canvas in this diptych.  Please click HERE for PART 1 

I had already sketched out the scene when I started the first piece so I was able to dive right into the painting.


This canvas will feature a waterfall so I block in the darks of the rocks around the creek and waterfall and the background trees.  I change the creek so it curves back to the right instead of the left.


Then I start to block in the greens plus some of the violet that will pick up the color of the flowers.  The greens are mixed with cerulean blue and cadmium yellow light.  Plus some have cadmium red light and medium mixed in.  I premix the greens and then premix an orange.  Then I pull a bit of each color from each premixed pile to get a wide range of greens.  I mix small batches at a time and then mix more as soon as it is used up.


I pop in the various shades of greens and violets throughout the painting working the entire canvas at the same time.  I start painting in the poppies, wet into wet, using a circular motion with the palette knives. 


I start fleshing out the tumbling waterfall using cerulean blue and a bit of cadmium yellow and titanium white.  Some of the cadmium red on my palette also mixes into the water colors.  Hollyhocks and broad leaves are added. 


I keep working the entire surface adding more poppies, hollyhocks, broad leaves into the wet paint.


White water is added to the waterfall and ripples added to the pool of water.  Goldfish are flecked into the water and ripples pulled over them.  


This is my palette by the time the painting was completed.  My taboret is an old AV cart I bought at IU Surplus for something like $10.  The cart even has an electric cord and outlets if I ever want to plug it in!  But it is the perfect height to paint standing up and has two shelves for painting supplies like brushes, knives, paper towels, etc.


I took this side shot of the painting to show the thick, heavy, impasto paint on the surface.  Photos on the internet simply fail to convey the energy and richness of the thick paint!  


And here is the final, finished shot of the diptych:

 "Poppies, Hollyhocks, and Lilies by the Creek", oil on canvas, diptych, 30" x 60" overall, each canvas 30" x 30", Code #030416 S 30x60, by Charlene Marsh, c. 2016.

Thanks for following along!

Happy Trails!

Charlene

P.S.  Be sure to sign up for my email newsletter, The Art Brush, to be notified when paintings are made available and receive special pricing.  Subscribers also receive updates about my exhibition schedule, paintings in progress, tools, equipment, supplies, workshops, classes, painting tips, reviews, auctions, and other news.

Saturday, March 5, 2016

030216 30x60 PART 1 Poppies, Hollyhocks, and Lilies by the Creek


This diptych features two paintings that are each 30" x 30" making a finished over all size of 30" high x 60" wide.  This blog is PART 1 of a two part blog that shows the painting from beginning to end.  Please click HERE for PART 2 to see how the second canvas progresses and how the painting looks when it is finished.

I am doing this on stretched canvas which is different for me.  I typically paint on the hardboard panels but thought I would try the canvas wrapped stretcher bars that won't necessarily require a frame.  Although, to protect the thick paint marks when I take them to shows, I may need to frame them anyway! 
  
I draw the initial sketch with a mix of cerulean blue and magenta with a brush dipped in linseed oil.  I am going to work on the left canvas first.  Since I like to work wet into wet, I cannot work both canvases at the same time without the paint drying too fast on me.  
So I start by blocking in the dark greens of the trees in the background using a mix of ultramarine blue, cadmium yellow light, and some magenta or cadmium red to make it even darker - almost a black green.  Then I mix brighter greens using cerulean blue and cadmium yellow and block in the foreground greens.  I mix a wide variety of greens to work all over the surface.  I mix up an orange with cadmium yellow light and cadmium red light and/or magenta and mix that with the cerulean blue and yellow (green) mix. 
I add the sky and then I start popping in the poppies and magic lilies on top of the wet paint of the green foliage.  I use some of the cadmium red/ultramarine blue mix in the creek where iron oxide rocks color the water.  Cerulean blue, with a tad of yellow, is used for the creek.
Even though I am going to paint the second piece when the first one is finished, I pull some of the color onto the canvas of the second painting to help unify the two paintings so they can work together when completed.
I start painting in more of the flowers working across the entire surface.  I add branches and trees in the background.  And then more flowers and sky.  Some goldfish are added to the creek and ripples of water pulled over them.  The work becomes somewhat frenetic and intuitive.  I step back often to study how the painting looks from a distance.  And then step forward to make more adjustments.  

At this point, the first painting is 98% finished.  I stash it outside in an unheated building at night during the course of the work to keep it from drying too fast.  Temperatures drop below freezing at night so the building stays quite cold and slows down the drying time.  I want to be able to go back into the painting with touches of color from the second painting, as needed, to help tie them together.  I stash my palette in the freezer overnight to keep it from drying out too fast.

I will write another blog following the progress of the second painting so stay tuned to see how they turn out and how they look together when finished.

Thanks for following along!

Happy trails!

Charlene

P.S.  Please sign up for my e-newsletter, The Art Brush, to get information I only share with my subscribers! 

Wednesday, March 2, 2016

Morning Glories and Magic Lilies 020716 12x12

Seems when I shoot progress shots while working on a painting in the studio at night, they come out slightly blurry!  I debate whether it is better to show a blurry pix that some may get a small benefit from or leave them out!  I guess this time, I'll include them.  After all, I often paint sans glasses so it is all blurry to me!  Ha!

As usual, I start with a tinted panel and sketch out the basic layout of the scene and start blocking in the darks.
I wanted to include a large tumble of morning glories that I use to disguise an ugly electrical box next to the deck along with the magic lilies, hollyhocks, and goldfish pool.
Henry decided to take a nap on the second shelf of my taboret.  Such a cutie at the moment - but he can be a little rascal!  Sometimes he tries to take a nap on the top shelf when my palette is full of paint!  He hates paint on his paws and jumps right down, sometimes leaving a trail of paw prints all over the studio! 
After blocking in most of the greenery, ground, and background, I start adding the flowers, wet into wet.
Working the entire surface at the same time, I pop in flowers and vines and branches, background, foreground, back and forth.  Small details like the centers of the morning glories and ripples of wind on the goldfish pool are added and the painting finalized.
Here is the final painting, Morning Glories and Magic Lilies, 020716 12x12.  

Thanks for following along!  

Happy Trails!

Charlene

P.S. Be sure to sign up for my Art Brush newsletter to get all kinds of specials and information!